By Greg Nowak. Updated 11 October 2026.
A missing password reset becomes a support request. An invoice that lands in spam can delay payment. Installing Postfix is only one part of making email dependable: someone needs to check what happens between the application, the relay provider, and the recipient.
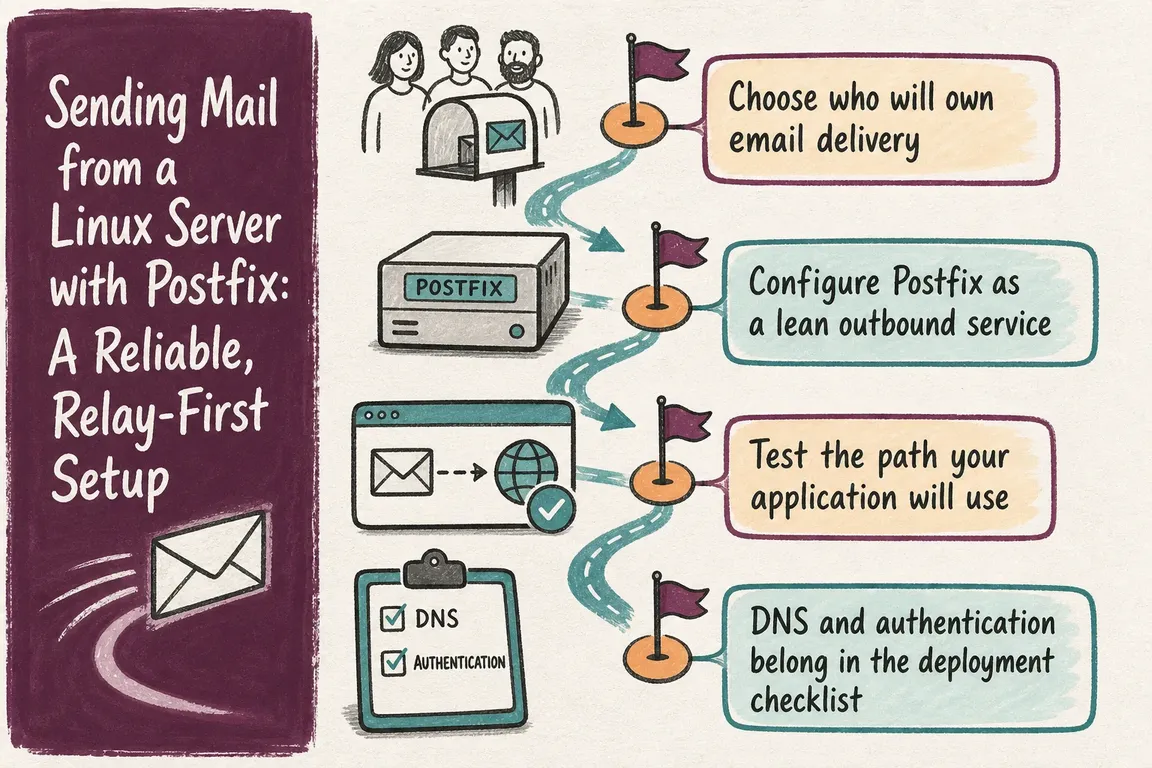
For business websites and agency-managed servers that need local mail submission, I recommend Postfix with an authenticated SMTP relay. Postfix queues messages and retries temporary failures; the provider handles onward delivery. Your team still owns sender authentication, application settings, and responding when messages fail.
Choose the delivery model your team can maintain
| Approach | Good fit | What your team maintains |
|---|---|---|
| Postfix with SMTP relay | Applications and scripts need local submission and queueing | Postfix, credentials, sender DNS, and bounce handling |
| Provider API | The application has a maintained provider integration | Application retries, API credentials, and delivery events |
| Direct SMTP delivery | A team deliberately operates public mail infrastructure | Port 25 access, IP reputation, reverse DNS, abuse handling, and receiver policies |
Before selecting a relay, check sending limits, permitted message types, domain verification, and delivery logs. For client projects, establish who owns the provider account and DNS access. Those details matter when credentials expire or an agency relationship ends.
Configure Postfix for applications on the same host
This example assumes a dedicated outbound service on Debian or Ubuntu. Back up the existing Postfix configuration first. A server that already receives mail needs a separate review before these settings are applied.
sudo apt update
sudo apt install postfix mailutils libsasl2-modules ca-certificates
postconf -m
postconf default_database_type
The example uses hash tables. Confirm that postconf -m lists hash; otherwise use a supported indexed type consistently, including its generated database filename.
Edit /etc/postfix/main.cf, replacing the example domain, hostname, and relay endpoint:
myhostname = app01.example.com
myorigin = example.com
mydestination =
inet_interfaces = loopback-only
relayhost = [smtp.provider.example]:587

smtp_tls_security_level = secure
smtp_tls_secure_cert_match = nexthop
smtp_tls_CAfile = /etc/ssl/certs/ca-certificates.crt
smtp_tls_wrappermode = no

smtp_sasl_auth_enable = yes
smtp_sasl_security_options = noanonymous
smtp_sasl_tls_security_options = noanonymous
smtp_sasl_password_maps = hash:/etc/postfix/sasl_passwd
This follows the Postfix outbound-only configuration pattern. An empty mydestination removes local domain delivery, while loopback-only limits SMTP listening to the host. Containers have their own localhost; give them an explicit submission route rather than exposing Postfix broadly.
The brackets prevent an MX lookup for the relay. Port 587 normally uses STARTTLS. If the provider requires implicit TLS on port 465, change the port and set smtp_tls_wrappermode = yes.
Encryption and identity verification are separate checks. The Postfix TLS documentation explains that encrypt allows untrusted or mismatched certificates. Here, secure with nexthop requires a trusted certificate matching the configured relay hostname. Resolve certificate failures rather than weakening verification. This policy suits a known relay, not general direct delivery to Internet mail servers.
Store SMTP credentials and check the configuration
Use the provider's SMTP credentials, which may differ from its dashboard login. Create or edit the credential file without removing existing entries:
sudo sh -c 'umask 077; touch /etc/postfix/sasl_passwd'
sudo chown root:root /etc/postfix/sasl_passwd
sudo chmod 600 /etc/postfix/sasl_passwd
sudoedit /etc/postfix/sasl_passwd
Add the following line with real credentials:
[smtp.provider.example]:587 USERNAME:PASSWORDThe key must match relayhost, including brackets and port. Build the lookup database and restart:
sudo sh -c 'umask 077; postmap hash:/etc/postfix/sasl_passwd'
sudo chown root:root /etc/postfix/sasl_passwd.db
sudo chmod 600 /etc/postfix/sasl_passwd /etc/postfix/sasl_passwd.db
sudo postfix check
sudo systemctl restart postfix
postconf -n
The Postfix SASL guide documents these lookup requirements. Protect both credential files in backups and rebuild the database after rotation. Review postconf -n for inherited settings that could change routing. Passing a configuration check does not prove delivery works.
Test the message, then test the business workflow
Send to an external mailbox you control, using a sender the provider authorises:
echo "Test from $(hostname -f)" | mail \
  -s "Postfix delivery test" \
  -r [email protected] \
  [email protected]

sudo postqueue -p
sudo tail -f /var/log/mail.log
The -r option sets the return address in GNU Mailutils. Other programs called mail can interpret flags differently. If mail logs go to the journal, use sudo journalctl -f and locate Postfix messages; filtering only by the service unit can miss transactions.
Follow the queue ID to the relay response. In this setup, status=sent means the relay accepted the message. Check provider events, the recipient mailbox, spam placement, and authentication headers before calling the test complete.
Then trigger a real password reset, enquiry, or invoice. An application may bypass Postfix or use a different sender. Measure whether the message arrives while it is still useful: a queued password reset delivered after its link expires is still a failed customer journey.
Use a sender identity recipients can verify
Gmail's sender guidelines require SPF or DKIM for all senders to personal Gmail accounts, and SPF, DKIM, and DMARC for bulk senders. Configure all three as your baseline:
- Verify the sending domain and enable the provider's DKIM signing.
- Follow its SPF instructions, merging authorised services into one SPF record per relevant domain.
- Check that the visible From domain aligns with the domain authenticated by SPF or DKIM.
- Begin DMARC with reporting and a monitoring policy, then review legitimate senders before tightening enforcement.
For contact forms, use your own authorised address in From and put the visitor's address in Reply-To. The relay provider normally manages reverse DNS for its delivery IPs; installing Postfix does not require turning your application host into a receiving mail server.
Make delivery ownership part of the handover
Monitor queue growth, the oldest deferred message, and provider failures. Investigate authentication errors, timeouts, and sending limits before repeatedly flushing the queue. Use a working return address or process provider bounce events, and send critical delivery alerts through an independent channel.
Record the account owner, DNS access, credential rotation procedure, and tested workflows. Configure system alerts with explicit, authorised senders and monitored recipients; do not assume mail addressed to local root will reach someone. Repeat delivery checks after migrations or provider changes.
If mail delivery responsibility is scattered across hosting, application code, and DNS, Greg can help review the path, identify gaps, and agree a practical implementation and handover plan. Talk to Greg about your mail delivery setup.
Related on GrN.dk
- Sending Mail with Drupal: A Reliable Setup for Business-Critical Email
- Enable TLS on a Linux Mail Server Without Breaking Delivery
- Locked Out of Your Apple Developer Account? Fix Access Before October 1
Need help with this kind of work?
Talk to Greg about your mail delivery setup Get in touch with Greg.